Â
âď¸ For more brilliant craft ideas for toddlers and children head to our Reuse & Recycle page.
âď¸ Or have a browse of our Pinterest boards for even more craft and play ideas.
Â
Â
Ten years. I still can't quite believe it!
Way back in 2012 when Clara and Macy started, I never intended to run a business - I worked in animation as a puppet maker for stop motion TV and film. The business just kind of happened.
I had a very specific (and different) aim for my own work. To design two picture book characters, Clara and Macy, and develop their world enough to send out to publishers in the hope of getting a picture book deal. I knew that it was a tough world, as so I set out to share my characters and prove that there was an audience for them.
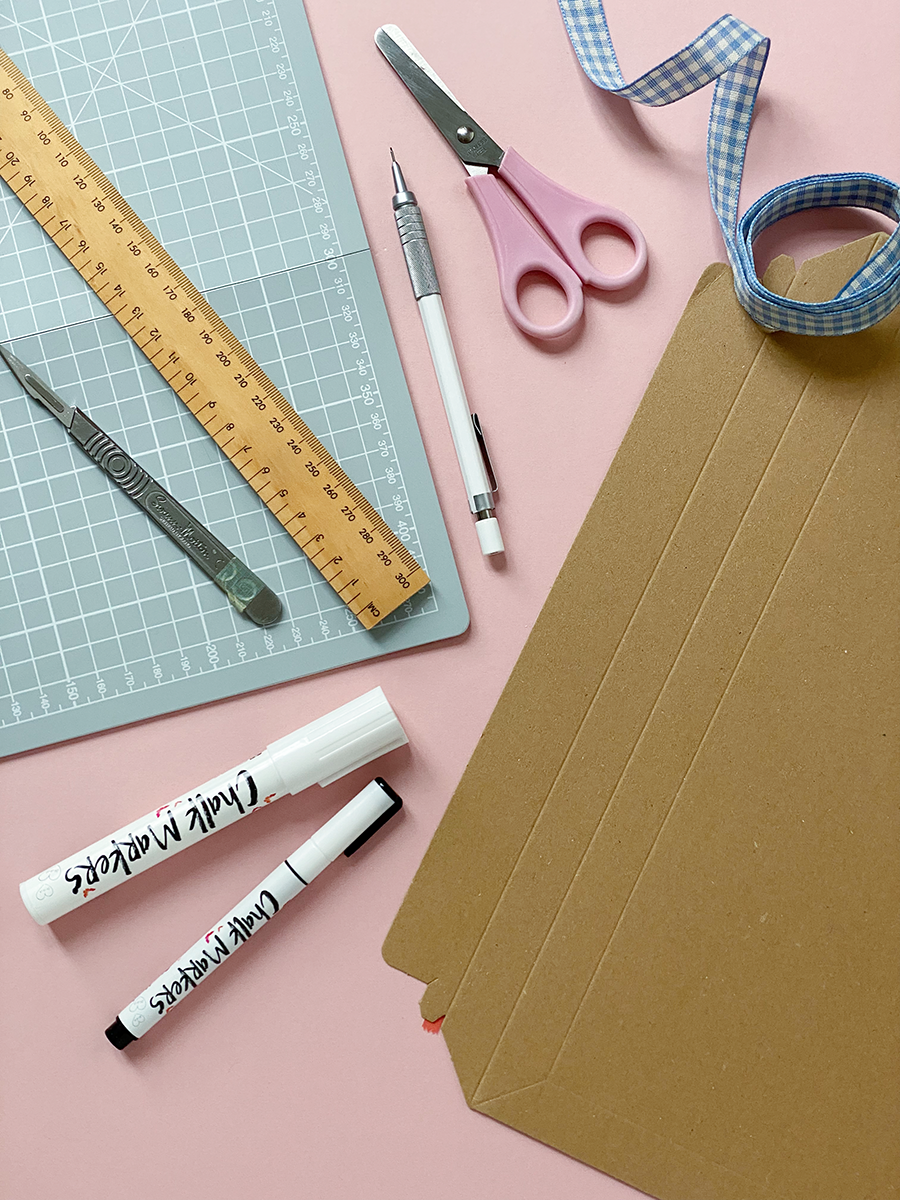
So I designed some Clara paper dolls and a few craft kits (of Clara and Macy's toys) and shared them online.
I was, amazingly, spotted by notonthehighstreet to sell on their marketplace, and on July 25th 2012 the business was born. We had two young children at the time, who were three and one, and our dining table to work from. My Noths shop took off like I could never have imagined.
As things got busy, my picture book idea was put on the shelf while I started to grow this business - with NO IDEA what I was doing!
I definitely wasn't prepared for what was coming!!
Our craft kits were invited to feature in the 2012 Christmas catalogue and that blew me away! Long nights working in the dining room, orders stacked along the wall, and the daily walk to the post office queuing for postage.
The crazy Q4 tiredness got the better of me, and working oaths huge new thing with two tiny children, my brain was scrambled! It was so bad that I sent poor Matilda to school in fancy dress on the wrong day!
2013 brought new products as I got into the swing of designing and finding me business feet. Our doll kits came along that year as I worked towards personal products not simply personalised.
The bones of the Clara and Macy business were forming as I found my feet and got to grips with the core of my brand đ
The business had well and truly taken over our dining room and our house by this point. There was stock everywhere!Â
We won a notonthehighstreet Make Award for Storefront Success in 2013, which was presented during my first big business event, Make Do & Meet. That felt amazing!
2014 is summed up by Black Friday. The first one we ever experienced. WOW! We were definitely not ready for that, and we took our highest number of orders in one day ever!
Still working from home but luckily we had hired our first staff that year, so we had help. We could not have done it without them.
That year we launched our first wrapping paper design - Christmas carrot - and it went wild!
Being thrown into the seasonal business rollercoaster without expectation, the highs and lows were big that year. I still have no idea how to figure that out!
2015 was a BIG year! A lot happened in business and in life.
⢠We won a luxury holiday to Zanzibar through a competition notonthehighstreet ran for their sellers. What?!
Seven years on and I still can't believe that happened! It was AMAZING! And such a crazy lucky thing to happen. I'm forever grateful that Tom and I got to experience such wonder. Thank you Noths!
â˘Â We moved the business out of our dining room and into our very first studio. It was a huge leap and I was terrified to jump. What if we failed? What if I didn't know how to run a business outside of the house?!
Deep breath, it worked! It was the best thing we could have done. Our studio gave us a huge opportunity and was a gorgeous place to spend our work days.
⢠And Martha was born! Our third child. Born in early November, she was peak Christmas season baby so she spent her early weeks and years at the studio.
Sleeping under a desk, packing orders in a sling, and being snuggled by an array of happy-to-help family!
A little quieter, 2016 brought new products, new plans, our own website (finally!), and then a huge piece of press.
Joules and Jamie Oliver announced the birth of their baby River using our Dream Big Print. It went nuts! Press, orders, emails, it was chaos! And we were so grateful for it đ
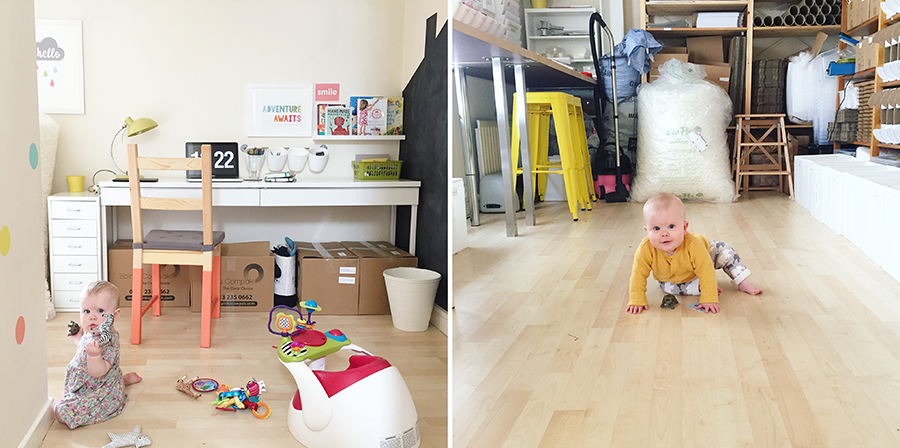
2017 gave us a toddler in the studio! Everything ended up on the floor!
And it was the beginning of enamel pins. This was the year that we took a huge turn in our product range, ending our engraved bamboo gifts and bringing in fresh new pins.
It was a good decision!
The I Believe pins were our first design, and the range has grown and grown since then. They're SO fun to design :)
In 2018 we brought in our hug pins đ
And you absolutely blew us away with your orders for them! Within weeks they became our bestselling product ever!!
Wholesale orders brought a few all-nighters, and we worked our socks off to get through everything that year.
Animal stockings took over!
It was another year of growth as we expanded our studio into the downstairs space, and turned a dark room into a lovely pink and grey studio space complete with a Christmas tree photography area.
2019 was a HUGE year for us as a business and a family, and the beginning of a rollercoaster few years that I don't think we'll ever forget.
⢠Our fourth baby was on the way, but a very difficult and complicated pregnancy put me on bed rest for the first few months of the year. Our tiny Miles was born at 29 weeks and he had a very rocky start to life.
As you'll know from my Instagram he's doing amazingly now!
2019 was dominated by hospital visits and neonatal. But we all got through it, and we're stronger for it.
Â
⢠While Miles was still in neonatal we had to find a new studio at quite short notice. It was a double stress blow, and a definite dip on our small business rollercoaster. My family and staff were INCREDIBLE during that time. They moved everything, and set us up brilliantly.Â
We found the lovely studio that we're still in now, it's location is amazing, and looking back we're SO glad that we moved.
⢠Another Christmas with a new baby, but Miles couldn't be with us at the studio much like Martha could, he was still on oxygen and had more complex needs due to being premature, so we juggled!
Two parents, four kids, two businesses, me expressing breastmilk every three hours, in the peak of Q4! I'm still tired just thinking about it!
And then just as we started finding our feet again 2020 happened.
After our 2019 that felt like a kind of lockdown, Covid hit and we went into actual lockdown. That was one of the biggest challenges we had ever faced in our business.
Keeping our staff safe, families safe (Miles was on the shielding list), homeschooling the kids, and as everyone turned to online shopping our orders rocketed!
⢠It was the busiest we had ever been. We were incredibly lucky, and incredibly freaked out! The team were amazing, as always, and while we all worked from home, social distanced in the studio, wore masks everywhere, we somehow managed to send out more orders than ever before.
⢠We took on additional freelance staff for Christmas, and came up with our genius system of freelance prep boxes for our stock to be made outside of the studio. Thank goodness because that Q4 was absolutely manic!
⢠And we joined Friends of Joules, which felt like such a great addition to our lineup.
2021 brought more lockdowns and more juggling.
Our systems were stronger this time though, and we were able to cope a lot better. 2021 also brought the big online slow down when high street shops were able to re-open again.
The uncertainty was a challenge, but we focused on what we love - designing new products that feel just right for Clara and Macy.
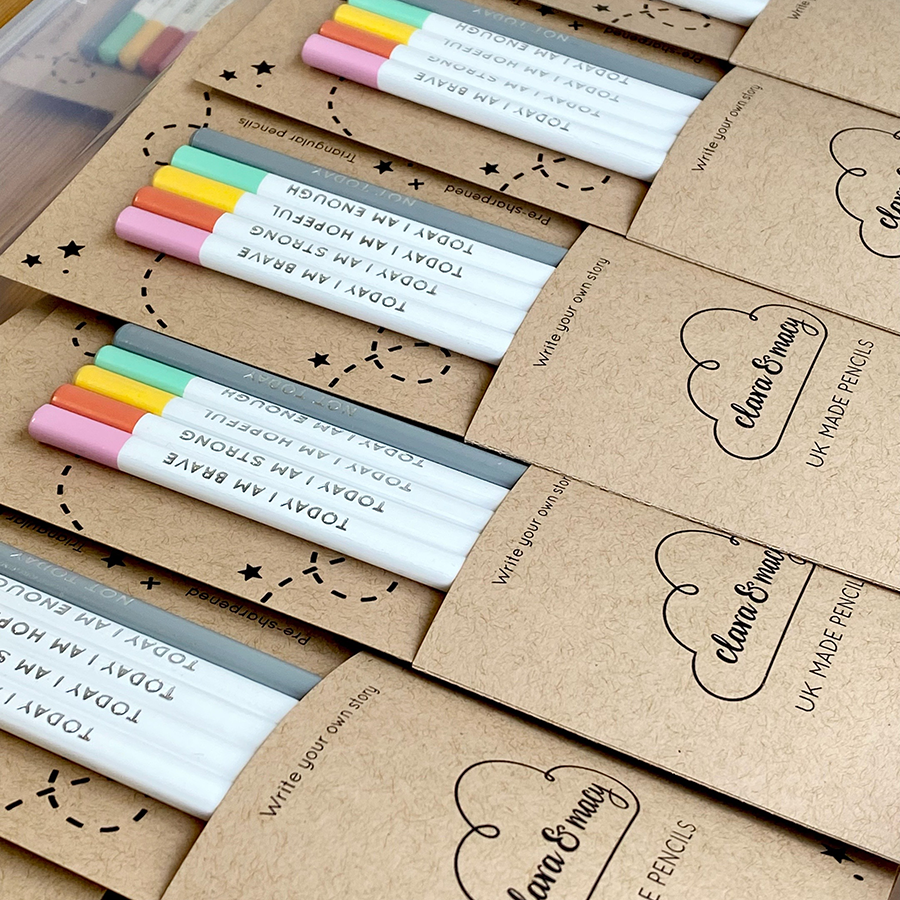
We launched, what was quickly to become another bestseller for us, positive pencils. Along with a really special Christmas range that I loved designing and making.
We also had our very first proper Christmas photoshoot. It was so fun!
In 2021 we also added a new strand to the business, our Faire wholesale shop. It has been brilliant to grow our wholesale side, and we've gained some gorgeous new stockists over the past year.
We've been very lucky!
And here we are in 2022. Our ten year business birthday. I can't quite believe it!
Since Clara and Macy started we've sent out more than 100,000 orders, moved from our dining table into two wonderful studios, and we've gone from two children to four!
I never dreamed ten years ago that I would be here running a double-figures aged small business, with a beautiful studio, products that I love, super supportive customers, and a team of staff who amaze me every day.
Add to that an incredible family, and small business support collective, and it's feeling pretty wonderful đ
Running a small business is exhausting, confusing, amazing, thrilling, and utterly unpredictable! I've learnt so much and still have SO much to learn - even ten years down the line I'm winging it most days.
Thank you so much for being part of this journey. We couldn't do it without you, and your support means so much đ
I can't wait to see what comes next for Clara and Macy... maybe that picture book?!
Â
Â
Â
]]>To celebrate our 10th business birthday, we turned some of our cardboard packaging into some gorgeous birthday crowns đ
These crowns are so fun! They're perfect to make for a celebration, a birthday, a special weekend picnic. Or to add to your role play dressing up box, your story telling extras, and they're a great school holiday craft project đ
If you have some leftover cardboard, or have recently received a lovely order from us in a cardboard envelope, you can reuse and recycle it into these birthday crowns.
Read on for the tutorial...
Materials:
⢠Cardboard
⢠Ribbon (approx. 80cm)
⢠Pencil
⢠Ruler
⢠Cutter (box cutter, scalpel, or scissors)
⢠Cutting mat
⢠Chalk pens, paints, or markers
⢠Birthday crown template (download here)
Packaging we used:
Large board envelope that we send our wrapping paper, prints, and card bundles out in.
Each one of these envelopes will make two crowns.
How to make it:
1. Cut the two ends off the cardboard envelope, which will give you a great folded over piece. If you're using a different flat piece of cardboard, fold it in half.Â
2. Print out or copy the birthday crown template provided and place it onto the fold of your cardboard. Trace around the template.
3. Cut out your crown shape, remembering to cut through both layers of cardboard, to create your full size crown.
4. Turn your cardboard over, so that you're now using the clean inside or blank side. Draw your pattern onto the crown. We've drawn a moon, stars, and the number 10 on our crown, to celebrate our 10th birthday with.
5. To copy our design, cut out the stars and moon as shown on the template. Remember to also cut out the circle in each bottom corner - these are to thread your ribbons through.
6. Use a chalk pen, paint, or other pen, to cover your crown in a pattern of delicate stars.
7. Thread and tie a ribbon through each corner circle you cut earlier. Our ribbons were approx. 40cm each.
Your crown is complete!
Crowns are great for celebrating with, for role play, and to use while storytelling. They're so versatile and so fun!
Have fun recycling your cardboard into something beautiful. And look out for our next Reuse & Recycle project soon.
Please share your creations with us on Instagram or Pinterest, we'd love to see them đ
âď¸ For more brilliant craft ideas for toddlers and children head to our Reuse & Recycle page.
âď¸ Or have a browse of our Pinterest boards for even more craft and play ideas.
Â
Â
Â
Â
]]>The summer camping season is nearly upon us and our calendars are already filling up with school residential camps, brownie camps, Duke of Edinburgh camps, and fun holiday activity camps.
If you've got kids heading away on an exciting adventure it can feel daunting to get everything ready.
Don't fret, read on for some tips that might make packing a little easier...
1. Label everything
A lot of kids plus hundreds of items of clothing's a recipe for lots of missing items! So label everything - even their toothbrush!
Sharpie them, sticker them, or try using our favourite iron on labels from Petit Fernand.
2. Send secret hugs
For nervous campers, or for kids going away on camp or sleepovers for the first time, use our iron-on 'A hug from Mummy' patches to add a hidden hug to their blanket.
3. Make a checklist
Have the kids do most of their own packing, and send them with a list of everything they've got in their bag.Â
That way they'll feel confident to find and pack their own things for coming home.
4. Include some extras
Your camp packing list might only include the essentials, so think about adding some enjoyable extras too.
A disposable camera to record memories, a book for some downtime, and a small teddy or comforter for bedtime.
5. Add some strength
Remind your camper that they've got this by pinning a positive reminder to their bag, or or by hiding it deep within their clothes to find mid-camp.
Bonus tips:
⢠Roll clothes into your suitcase/bag, don't fold them. They take up less space rolled and they're easier to pack.
⢠Use dividers or zip-lock bags within your main bag to keep everything organised. Keeping everything in it's own section makes packing and unpacking a breeze!
⢠Forget the phone. Unless they're older or really need one for safety reasons, leave the devices at home. It's much easier to settle and immerse themselves in the experience without one.
⢠If it's a school camp don't forget to thank the teachers after they're home! I can't imagine how exhausting taking 30+ kids away is! A personalised card and some treats should do the trick!
Have you got any great camping tips?
We're deep in spring crafting mode here - at the studio I'm prototyping new craft kits, and at home Martha is spending most of her waking hours making ALL of the things! Every bit of paper and cardboard becomes something to cut, glue, paint, design, and craft with!
But what do you do if you're itching to get creative with your kids and you've got very little time, plus a reluctant crafter?
I've put together 5 simple ideas to encourage those little ones who aren't so creatively minded. Read on for more...
You can get some amazing free downloads, which make craft and creativity super easy. Start with our paper finger mice, which you can download the template and instructions for here.
We made our mice using some of our favourite wrapping papers.
The pastel patchwork wrapping paper and the yellow botanical wrapping paper designs were perfect for some spring fresh mice. At 100gsm, the uncoated and recyclable paper is really lovely to use when crafting.
Once you've tried making some mice why not head to Pinterest for some more downloadable freebies.
2. Keep new crafts simple
When learning something new, keep it really simple, and build confidence from there. A great tip when you're learning how to sew is to use felt instead of cotton material because felt doesn't fray.Â
Sometimes using a craft kit can bring confidence even more. Beginners make like to follow written or video instructions, so take some time to explore all of the different options if the first one doesn't stick.
It's really easy to get creative with your leftover packaging. Junk modelling is a great way to start.
Our favourite tip is using paper tape - paper tape instead of classic clear sellotape really levels up your cardboard creations. You can draw and paint on it too, and it blends seamlessly with standard cardboard boxes.
If you need a quick idea, follow our tutorial to make an easy noughts and crosses game. Or for some more adventurous project ideas try making our roman amphitheatre or solar system model.
4. Use duel purpose items
Sneak creativity into pockets of time, and save some money, by using products that have a duel purpose. Reluctant crafters may not even notice that they're crafting!Â
Our paper doll wrapping paper is perfect for this. Wrap it then craft it!
5. Take it outside
Even the most reluctant creatives may find inspiration outside. Leaf printing, shadows drawings, making mud pies, or painting the walls with water.
Head to Pinterest for some great garden play ideas.
There is fun to be had in any weather, and there are endless ideas to encourage your little ones to have fun and get creative.
Â
Happy crafting team!Â
I hope these ideas help your reluctant little ones to get creative đ
âď¸ For more brilliant craft ideas for toddlers and children head to our Reuse & Recycle page.
âď¸ Or have a browse of our Pinterest boards for even more craft and play ideas.
Â
Â
Â
]]>Â
Reuse the packaging from your Clara and Macy orders (or any other leftover packaging) to create something new. Turn your ordinary cardboard into something full of imagination and inspiration. And help the planet at the same time!
Welcome to our new Reuse & Recycle project đ
Let's start with this charming and fun XOXOÂ noughts and crosses game.
It's perfect for gifting and playing over Valentine's Day. And it's super easy to make.
Â
Â
Materials:
⢠Cardboard
⢠Pencil
⢠Cutter (box cutter, scalpel, or scissors)
⢠Ruler
⢠Cutting mat
⢠Glue
⢠Chalk pens, paints, or markers
⢠XOXO counters template (download here)
Â
Packaging we used:Â
Flat pack cardboard box (BEP30) that we send our craft kits, wrapping paper bundles, and stockings out in.
Â
How to make it:
1. From a flat piece of cardboard draw and cut a square approx. 20cm x 20cm. Our sizes are shown as specific sizes but please use whatever sizes work for you and the cardboard you have available. This square will make the board game base.
2. To keep the game pieces in place we'll add a border. Cut four strips from the cardboard that are approx. 0.5cm x 19.5cm.
3. Cut two cardboard strips approx. 0.5cm x 19cm and six strips 0.5cm x 6cm. Â
4. These strips will become the board for your noughts and crosses game.
Â
Â
5. Take the four longest strips and glue them around the edges of your flat square. Â
6. Carefully lay your next two longest strips across the board, with the six short strips in-between, to create a crossed pattern. Once you've got nine equal spaces glue the strips down into place.
7. Use the template provided to trace the crosses and circles onto your cardboard. Use your cutter to carefully cut out these shapes.
8. Repeat until you have five of each shape.
Â
Â
9. Add some colour to your counters with chalk pens, paint, or markers. We chose two shades of pink to give it a loved up Valentine's Day feel.Â
Â
Â
10. To make the spaces on the board stand out we used a white chalk pen to colour the cardboard grid.
Â
Â
It's time to play! You be the hugs and I'll be the kisses đ
Keep reusing and recycling your packaging, and look out for more simple, creative ideas from us soon.
âď¸ For more brilliant craft ideas for toddlers and children head to our Reuse & Recycle page.
âď¸ Or have a browse of our Pinterest boards for even more craft and play ideas.
Â
Â
]]>Weâve been keeping a secret đ
Weâre adding a fourth baby to our family in August, a little boy, and weâre SO excited!
I canât believe weâre going to have an even team of two girls and two boys. Itâs amazing! The kids are super excited, especially Martha who canât wait to be a big sister đ
Iâm just over half way through the pregnancy, and itâs been a bit of a rollercoaster so far with severe sickness, a pretty scary haemorrhage, and six weeks of bed rest.
But everything is settling down beautifully now and Iâm feeling much more like my normal self. And the baby is perfect! Kicking away and getting comfy in this growing bump đ
I still canât believe weâre going to have four! It suddenly feels like an awfully big number.
But such an exciting one!!
đđđđ
⨠Stockings are here â¨
Iâm SO excited to be launching our very own range of Christmas stockings today.
Four animals that can be dressed up with fun accessories, and theyâre completely handmade from luxurious wool felt here in our Cheshire studio.Â
Penguins, bears, polar bears, and foxes đŚ
They started life as teeny tiny sketches. A simple idea to turn my animal designs into Christmas stockings. And then to add a twist. A dress up element.Â
A bear in a superhero cape, a penguin in a hat and scarf, or a fox in a bowtie and glasses. A practical Christmas stocking that instantly becomes a friend to play with.Â
I just love them đ
They have been months in the making - these little pencil drawings started back in April I think, maybe even March.Â
And theyâre now available to pre-order here. Yessss!
As a special treat to you lovely folk you can get 20% off and free delivery when you pre-order this week â¨
The first batch of stockings is very limited as this is such a new product type for us đť
So if you want an animal stocking friend to hang up for Santa 10 weeks today (how is Christmas Eve only 10 weeks away?!) please do make sure you get one in time đ
Iâm SO excited and nervous about launching these little guys.
Theyâre one of my all time favourites and I really, really hope you like them too â¨
]]>You guys. Today's picture book of the week is absolutely delightful. And I'm utterly in love with it đ
It's called I Don't Want Curly Hair by Laura Ellen Anderson.Â
Laura's illustrations are so full of character and charm. I honestly can't stop looking at them!
And the way she draws that curly hair is just SO beautiful.
I mean look at it.Â
That hair is full of character!
The little girl in the story does NOT want big curly hair. She tries to banish it using various methods from brushes to piles of books to tying balloons to it.
Of course none of them work, but it's so funny to watch her try.
She meets a girl with the smoothest, silkiest, straight hair, and of course all she's ever wanted is the exact opposite - big beautiful curls!
And the ending is so sweet đ
It's the perfect picture book for little people who always want what they can't have - and helps them learn to love what they do have.Â
The kids adore this book. And we're all agreed that the big curly haired girl in this book reminds us of Martha, who also has wild untameable curly hair!
It's such a charming book that is full of beautifully illustrated fun and inspiration.
đ For more children's book reviews head to our blog.
đ Visit our story time category for our favourite products to inspire imaginations through reading and writing stories.
đ Or have a browse of our Pinterest boards for even more family storytelling ideas.
Â
Â
]]>It's amazing what you can make out of a cardboard tube and a little imagination.
When Matilda and Theo were little they went through a phase of wanting to make EVERYTHING out of cardboard tubes!
Theo still spends most of his time making things out of paper and card.
đ Cardboard tube rockets đ
To make your own cardboard tube rockets you will need...
- Cardboard tubes (eg. empty kitchen roll tubes or toilet roll tubes)
- Patterned paper
- Cardboard
- Double-sided tape or glue
- Small lengths of ribbon
- Pencil/ruler/scissors
1. Measure your cardboard tubes & cut out strips of paper that will completely cover them.
2. Cut a thin strip of a different coloured paper & stick it across the bottom.
3. Use double-sided tape or glue to attach your pretty paper to the tube. (We used double-sided).
4. Cut out a circle of patterned paper slightly larger than your cardboard tube. Cut a line to the centre, and glue or tape it into a cone shape.
5. Pop a strip of double-sided tape just inside the bottom of the tube.
6. Cut four length of ribbon. Our ribbons were about 30-40cm long which seemed to work well.
7. Stick your lengths of ribbon down onto the double sided tape.
8. Carefully make two small holes on either side of the tube at the top. Thread a ribbon or string through the holes for hanging or flying around.
9. Make a small hole in the top of the paper cone, and thread through there too. We added a tiny bit of glue and tied a knot in the string to hold the cone in place securely.Â
Voila! Another super duper easy craft project for little ones.Â
These rockets are such a simple make, and can even be extended into more complex projects like a mobile to hang above their bed.
You could mix and match these rockets with our cardboard tube butterflies too đ
âď¸ For more brilliant craft ideas for toddlers and children head to our Reuse & Recycle page.
âď¸ Or have a browse of our Pinterest boards for even more ideas.
Â
Â
Â
]]>Last week we discovered water beads for sensory play with the kids, when we needed a little end of school holidays activity treat, and what a revelation!
I first saw them on a wonderful instagram feed called Where Learning Meets Play, a teacher and mum of 6 in Australia who have quickly become one of my favourite ever insta-inspirations đ
Water beads are amazing, squishy little bouncy marble type things that expand in water. They are designed for floristry arrangements as they are great at regulating water, but they're also super fun for kids.Â
So after a little research I bought a tub of rainbow coloured water beads for our three kids to have a go with. They were super cheap - about £6 for a tub full of about 40,000 tiny seed like pellets. Not knowing quite what to expect when they arrived, we were fascinated!
To expand the water beads all you need to do is soak them in water.
We used a big stack-a-tub and filled it half way with water. Then dropped probably around a couple of thousand of the seeds in. Water beads take about 6-24 hours to soak in the water and fully expand.
After maybe 2 hours they looked like this...
And after 24 hours they looked a lot more like this...
When fully expanded the water beads felt lovely. Squishy, slippery, and really calming to run your fingers through - we were all quite taken with that feeling. They aren't at all sticky, which I didn't expect - but watch out they do bounce - and they bounce far!Â
From the moment we put the seeds into the water the kids were in love! They wanted to watch them grow, to touch them, and to play with them. Such a great activity for all three - a 9 year old, 7 year old, and 2 year old đ
Martha (age 2) in particular loved them.
She played a few different games with them including...
- Hide the toys.Â
This was super cute! She threw a few water safe toys into the tub and then tried to find them. The toys sank quickly and weren't as easy to find as you'd think! But she played this over and over again. A definite hit! At one point we definitely lost a tiny badger toy in there for about 2 hours!
- Scooping the beads.
She spent ages shopping the beads, with a little metal spoon from our play kitchen, into a plastic cup. Then tipping them out and starting all over again. Perfect for her motor skills :)Â
- Bounce the beads.
Remember how I said they were super bouncy? They went EVERYWHERE!Â
Once the beads are expanded you can get several days play out of them. If you leave them out to dry they will dehydrate and shrink back down to seed size.
We haven't tried this yet as we're still having too much fun!Â
And the best bit - because we were a little concerned too - they're absolutely fine for the environment. The polymer that water beads are made of is the same as the tiny pellets in potting soil to help regulate water uptake for plants. So when you're completely finished playing you can crush up the beads and add them to the soil in your garden. A massive win!Â
Don't put them down the drain though as they might block the pipes.
I highly, highly recommend giving water beads a go with your kids. Or just for you - they're totally therapeutic :)Â
Have fun đ
Feel free to ask any questions if you have any đ
P.S. It's worth bearing in mind that although water beads are non-toxic and perfectly safe for children to play with, they can be a choking hazard for little ones who might be tempted to pop a few in their mouth - so please do be careful.
âď¸ For more brilliant craft ideas for toddlers and children head to our Reuse & Recycle page.
âď¸ Or have a browse of our Pinterest boards for even more craft and play ideas.
Â
Â
Â
]]>I've been working on some pin badge designs and these are the first in a new range. Designed to wear on the outside or the inside. A little hug from Mum and Dad, for when you need it.
A secret squeeze for the tough days đ
After much debating and colour/wording testing, the first run will be âa hug from Mumâ and âa hug from Dadâ and then hopefully we can add to the range from there.
Iâm super pleased to say that pre-orders are now open and if youâre quick you can snap up our early bird pricing.
The pins usually take around 6 weeks to be delivered to us from the company who make them.
There are less than 10 left of each design at that price though after the majority were snapped up over the weekend, so think hare not tortoise for this one
Iâm SO happy that you guys who have seen them over on our social pages seem to like them. And I canât wait to start sending them out into the world in a few weeks đ
P.S. We're thinking of adding little sew in patch versions too - what do you think?
Today's book of the week is absolutely gorgeous đ
It's Mopoke by Philip Bunting.Â
I discovered it while browsing the big Waterstones in London when I had a couple of hours to spare before my train back up north, and thought I'd treat myself to some inspiring books. I'm SO glad I found this one. It's divine.Â
This is a mopoke. So simple and so fun.Â
Mopoke is a story of a little Australian owl struggling to find some peace and quiet. But he's about to learn that you can't always get what you want exactly when you want it. It's adorable đ
The colour palette alone is enough to make me want to stare at this book endlessly. Then the simple enticing illustrations are just so charming and clever.
All three of our kids love it - that's a range from 2 years - 9 years. And that makes me really happy!Â
Since buying this book I've discovered Philip (and his wife Laura's) range of other picture books. Oh my word. Koalas Eat Gum Leaves is next on my list.
I am majorly inspired by this incredibly talented family đ
They also have three kids, but live on the much sunnier side of the world!
Their philosophy and approach to children's books and reading with children truly speaks to my heart...
- Reading picture books encourages creative thinking. YES!Â
- Reading picture books develops a deeper parent-child relationship. YES!
- Reading picture books introduces a love of learning. YES!
ALL of these things are so amazing. The power of the picture book. It's all about spending time together with them.Â
And I think Mopoke is an excellent book to start with đ
P.S. Definitely head to Philip's website and watch the little Mopoke trailer - it's gorgeous!
đ For more children's book reviews head to our blog.
đ Visit our story time category for our favourite products to inspire imaginations through reading and writing stories.
đ Or have a browse of our Pinterest boards for even more family storytelling ideas.
Â
Â
]]>We're a few days into the school holidays and the "I'm bored" voices have started. If you're like me you're probably trying to juggle kids, a full time job, some kind of tidy house that never stays tidy for more than two minutes, and their constant need for food. And the weather forecast is for rain ALL week.Â
So here are five super simple creative ideas for a rainy day - perfect for filling those little pockets of time đ
1. Make Paper Finger Mice
It is super easy to make your very own little mouse pet out of patterned paper. All you need is some paper, glue, and scissors.Â
You can download our printable template here.Â
2. Make Cardboard Tube Toys
Cardboard tubes (like empty kitchen roll, tin foil, or toilet roll tubes) can be turned into so many things. The possibilities are endless. You can use them to make rockets, butterflies, or turrets on a castle.Â
You can find all of the instructions for making these cardboard tube butterflies on our blog post here.Â
3. Draw Or Paint A Life Sized Portrait
All you need is some giant paper, or a pile of normal sized paper all taped together, and some crayons or paints. Lie down on the paper and have someone draw all the way around you. And then get to work on decorating yourself!
Go as colourful as you like, and maybe add some stickers, sequins, and ribbons to decorate it with.
TOP TIPS:
Watercolours are hands down my most favourite paints for children. Theyâre easy to use, give gorgeous results, arenât too messy, and they last. Watercolours are a little more expensive than regular âkidâ paint, but I really think itâs worth it.
Use big paper, like sugar paper. Thicker, slightly textured paper is great for young kids as it can handle getting wet, and holds itâs form well. They can cut it, paint on it, and fold it.
Find more painting with kids tips here.
4. Build A Blanket Den
You can't go wrong with a cosy den built out of blankets and boxes. Try making it over chairs or your bed and then grab all of your cosy things and snuggle down for some quiet fun.
Our 'book of the week' posts might give you some inspiration for a new picture book to read in your den.
5. Play Colour Matching
A super simple game that you can make as easy or as complex as you'd like. Find as many things of the same colour as you can in your house and put them together in a gorgeous arrangement.
This is one of Martha's most favourite ever things to do. She could spend hours colour matching đ
And if you get really stuck head to our create and make section for some free downloads and our activity tokens section for more ideas. Have fun!
âď¸ For more brilliant craft ideas for toddlers and children head to our Reuse & Recycle page.
âď¸ Or have a browse of our Pinterest boards for even more craft and play ideas.
Â
Â
She's Easter ready!!
There is just something about the long Easter weekend that says family time, don't you think? Gorgeous days filled with spending time together, treasure hunts, roast dinners, board games, long walks, sunshine, and plenty of chocolate (obviously!) đŁ
This Easter has been all about dress up rabbit cards here at Clara and Macy HQ, and it's been wonderful to see photos of them out in the world over the past few days.
Thank you so much to everyone who shared photos with us!
It's incredibly heart-warming to see - especially as it's such a perfect little activity for parents and children to do together.
And that's what we're all about đ
]]>I've been making plans for this little blog and our very own Clara and Macy creative hub over the past few weeks, and it's been lovely. I can feel the future of it - another little piece of this brand jigsaw ready to slot into place đ
This year seems to be all about growing and rounding out this brand into the business it's destined to be. And so you'll be seeing a few changes around here - good ones I hope. And one of those changes is the addition of regular craft projects for children. From our family to yours.
And we're starting with...
đŚ Cardboard tube butterflies đŚ
With googly eyes. Because adding googly eyes always makes every craft project better in the eyes of a toddler!Â
This is a project I made with Matilda back when she was about four and I think we'll be having a go with Martha this week too đ
To make your own simple butterflies you will need...
- Cardboard tubes (eg. empty kitchen roll tubes or toilet roll tubes)
- Patterned paper
- Cardboard
- Double-sided tape or glue
- Googly eyes
- Small lengths of ribbon
- Pencil/ruler/scissors
1. Measure your cardboard tubes & cut out strips of paper that will completely cover them.Â
2. Use double-sided tape or glue to attach your pretty paper to the tube. (We used double-sided).
3. Draw a pair of wings on your patterned paper & stick it to some sturdy cardboard. Then cut them out. We put our spotty paper on the back of the wings too.Â
4. Attach the wings to one side of your covered tube using tape or glue. Matilda chose to mix and match the body & wing colours which looked lovely.Â
5. Stick on some googly eyes.
If you don't have any googly eyes you can always draw your eyes on with a pen.
6. Pop a tiny piece of double-sided tape just inside the top of the tube. Knot two small lengths of ribbon and stick them down to be antennae.Â
7. Carefully make two small holes into the sides of your tube and thread through a longer ribbon for hanging.
It's such a super easy craft project that you can keep as simple or extend to become as detailed as you'd like. Perfect to keep your little ones entertained during the school holidays đ
âď¸ For more brilliant craft ideas for toddlers and children head to our Reuse & Recycle page.
âď¸ Or have a browse of our Pinterest boards for even more craft and play ideas.
Â
Â
Â
]]>Today's book of the week is a classic, and one of my absolute favourites.
It's I Will Not Ever Never Eat A Tomato by Lauren Child. It has won countless awards for it's genius, and Lauren Child is the current Children's Laureate.Â
This original Charlie and Lola book was without a doubt the spark of inspiration for me starting Clara and Macy. The charming illustrations, the quirky fun nature of the stories, and the gorgeous sibling relationship between the two main characters.
It's a joy of a book.
And so funny!
I am super lucky to have found a hardback box set of the first three Charlie and Lola books in a charity shop years ago.
They're beautifulÂ
I first discovered Charlie and Lola via the animated TV series that I happened to see one day while I was painting at home - this was a few years before we had the kids.
I immediately searched for the books and wasn't at all disappointed.Â
The combination of hand drawn, paintings, and collage, is a dream to me. I was lucky enough to meet Lauren Child at her exhibition in Manchester - Green Drops and Moonsquirters, while I was very pregnant with Matilda.
She was kind enough to sign several books for me, and my love of her books grew from there and they have inspired me beyond belief.
If you haven't discovered them yet then you're in for a huge treat.
đ For more children's book reviews head to our blog.
đ Visit our story time category for our favourite products to inspire imaginations through reading and writing stories.
đ Or have a browse of our Pinterest boards for even more family storytelling ideas.
Â
]]>This little sneak peek, this rough pencil sketch, is the beginnings of a new logo for Clara and Macy. Not a rebrand, just a freshen up. A pulling together of what this business is and what it stands for.
Iâm going to be working on it a lot over the coming weeks and months. I feel like itâs got all of the magical everyday elements that Clara and Macy is all about. Plus pastel colours
Iâm sooooooo excited about it!
It's all part of the bigger dream for Clara and Macy. The dreams and plans of an exciting future. Hopefully!
There are just SO many things I'm hoping for. Dreams for their year, next year, five years, lifetime - they're all tucked up safe in my head, hoping to one day come true. I'm a huge believer in hard work and staying authentic to your own goals, and I'm determined to achieve at least some of them.
 To expand out wholesale range and become stocked in several shops. My dream shops are children's book shops - the kind with gorgeous wrapping paper and creative gifts on display to inspire little minds even future.
 To illustrate more. A lot more. I'd like the majority of my product range to be illustrated. I don't have much confidence yet but I love it.
 To write and illustrate picture books. This is the big one, the lifetime dream.
 To inspire creativity in my own children and other peoples.
Dreams are such wonderful things, don't you think?
After a gorgeous parents evening last night Iâm full of smiles today. When words like kind, thoughtful, hard working, determined, lovely, caring, funny, happy, and a pleasure to teach, are used about your children, I think itâs probably okay to feel quite proud of them
But enough gushing!
And on to little rabbits and little hands and how this was made...
These little dress up rabbit cards started life as pencil sketches which then developed into gentle watercolour paintings - my favourite style of illustration.
I like to use some collage in my illustrations too, like the fabric on his little green cardigan
I snapped these photos earlier in the week to freshen the product listing up. And yes, I did bribe Martha with chocolate and the iPad so that I could take product photos with her.
She stayed still just long enough for one photo every time she had a tiny piece of chocolate in her mouth. Thatâs how this photo was made - bribery and as many photos as I could take in a few seconds!
Totally worked until she realised the game Â
Â
Clara and Macy has been in this lovely little second floor studio for about two and a half years now, and I completely adore it.
Even more so now that I've got my own office! This room is my quiet space, my sanctuary from the busy. It's full of pink and yellow and grey, and so many of my favourite things - especially picture books.
The whole studio feels so fresh and bright and on brand. And soooo organised! We love to keep things as organised as we can. Thank you Ikea for that ;)
It's a big change from working at the dining table at home with three little ones causing chaos around me!
One question I need to ask - we wear slippers at the studio instead of shoes - is that weird? Do you wear slippers in your workplace?
]]>I'm sharing another book of the week today, and it's a beauty.
The Blue Whale by Jenni Desmond is an absolutely gorgeous picture book with a seamless blend between fiction and non-fiction.
Jenni's illustration style is so gentle and inviting. Theo especially loves this book as he's a bit of a fact collector.
His favourite fact from The Blue Whale is that "its mouth is so big that 50 people can stand inside it."
It's a big book, so perfect for displaying on your picture ledge shelvesÂ
Plus blue whales are AMAZING!Â
It's a beautiful book and I'm already itching to start collecting more of Jenni's books.
đ For more children's book reviews head to our blog.
đ Visit our story time category for our favourite products to inspire imaginations through reading and writing stories.
đ Or have a browse of our Pinterest boards for even more family storytelling ideas.
Â
Â
]]>I'm starting the day with tea, obviously, a cosy jumper, and my sketchbook. I've been planning out Instagram posts for March Meet The Maker (are you joining in this year?) and I'd like to share some snippets over here on the blog.Â
While the kettle is boiling letâs talk about the day three prompt - how it began.Â
I started Clara and Macy back in 2012 with a few illustrations and the idea of piquing the interest of a childrenâs book publisher by growing a following for my little characters - Clara and her twin sister Macy. The dream was always picture books but itâs a tough industry to break into. I thought maybe Iâd sell a few âbrandedâ products and that might help a publisher be more interested. I didnât really mean to start a business!
But the business grew quicker and bigger than I had ever imagined.
From a dining table business in our little two bedroom house, to our second floor studio in Altrincham, Cheshire. This was the view from the studio window this week during the 'beast from the east' snow!
Itâs a lovely place to have our studio. I walk about 20 minutes to get here from home - a little longer in the snow!
And the second floor apartment in that building over on the right of this photo is the first home Tom and I lived in together around 15 years ago. Itâs so strange that life brought me back here to the very same spot for our studio.
It was obviously meant to be
It still feels kind of special, and pretty amazing, even after nearly six years, to get to do this. Folding the wrapping paper, labelling the jar tokens, glueing the bambear ears. I mean, I get to design and make my own creations every day. Well not every day, some days I have to do accounts and thatâs definitely not my favourite!
But a growing business and three kids - it's busy.
So much so that I never had time to contact those publishers. I never even managed to finish my Macy products - thatâs her half-drawn over in the top left of the first picture.
And then somewhere along the way I lost my confidence in my drawing ability. But thatâs all changing this year. Iâm drawing again and it feels wonderful.
And I think perhaps 2018 might be the year to finally start speaking to those publishers. Or maybe 2019
]]>If you follow us on Instagram or Facebook you'll see that we spent Sunday afternoon making a model of a roman amphitheatre for one of Theo's homework challenges.
And he took over my Instagram stories for the day with a follow along tutorial of how he made it. It was SO fun!Â
And I'm pretty sure we've got a future Blue Peter presenter in the making ;)Â
We used:
- some thick cardboard sheets
- glue gun & glue
- acrylic paints
- a plate to draw around
- a scalpel (for grown ups only)
Theo did A LOT of research beforehand into exactly what type of model he wanted to make, and what he wanted his amphitheatre to look like. He LOVES this kind of thing!
He started by drawing several circles around our plate on the cardboard. Luckily we have lots of these big sheets of cardboard at the studio leftover from when our wrapping paper gets delivered. But any thickish cardboard would work.
We needed eight circles for our amphitheatre but you could use more or less depending on how tall you want it to be.Â
I cut each one out using a scalpel. Theo did have a little try with the scalpel, while I held his hand, but he's a leftie and found it really difficult. So I did the tricky cutting.Â
Once each circle was cut we made them into donut shapes with larger centre holes as we went. The bottom circle has the smallest hole and we each one about 1cm - 1.5cm bigger than the one underneath.
So you want the outside of the circle to be the same size, but the inside to get smaller - hope that makes sense!
These make the seats.
Whilst I was cutting the circles Theo painted the base using acrylic paints. He wanted a sandy base so used yellow, orange, and cream paints, with some green splashes for grassy areas!Â
- a top tip we found for painting sandy texture is to dab your brush onto the base rather than paint with strokes. So your dab dab dabbing to create a mottled texture.Â
Once all of the circles were cut we got our trusty glue gun out and glued them together.
Theo and Matilda are both really confident using a glue gun (all that wand making has paid off!). He started with the smallest ring at the bottom and then glued each one on top.
Then he glued this whole structure to the base.
To make the outer wall of the amphitheatre we cut a long strip of the same cardboard and Theo drew the shape of the wall he wanted - with one taller side.
A really good tip for helping the wall to bend around your circular seats is to scalpel some vertical lines at regular intervals. Cut through about half of the depth of the cardboard, so it doesn't slice fully through. Keep the cut sides as the outside, and then you'll find it bends round really well.
Theo drew some arches into the taller side of the wall and I cut them out.
We thought this gave it an authentic tumbledown feel!
Once they were cut we glued the wall around the outside of our circular seats.
This was a little tricky and we took our time. We found gluing it in small sections worked best.Â
We thought that the combination of the arches and the vertical slices gave a really good look to the outside wall. The slices worked really well!
Theo drew some lower arch shapes around the wall to give a bit more detail and a more authentic look :)
Once the amphitheatre was all put together we added a few details.Â
A lion, of course! We just printed this and glued it onto some thin card before gluing it to the base.
And Theo insisted on putting the gladiator on the steps outside of the amphitheatre - because why would he want to be inside with the lion?!
Well exactly Theo!Â
So there you have it. A pretty effective but really very simple to make roman amphitheatre.Â
Theo absolutely loved making it and he learnt so much.
Filming the process for his Instagram stories takeover worked brilliantly too, as he really thought extra hard about every step of the process so that he could explain it on camera.
One of his 'grown up' career options is to be a set designer for films. I think he's off to a great start don't you?!Â
If you have any questions do send them through - Theo is loving your messages and comments :) x
âď¸ For more brilliant school project and craft ideas for children head to our Reuse & Recycle page.
âď¸ Or have a browse of our Pinterest boards for even more school project, craft, and play ideas.
Â
Â
Â
]]>Martha is obsessed with painting. After cuddles with Daddy, milk, and Hey Duggee it's easily her most favourite thing in the world.
The other two loved painting too, but their enjoyment was nothing on hers. It's lovely to watch!Â
And I know it's a bit 'oh my gosh my child is amazing', but oh my gosh, my child is AMAZING ;)
She turned two in November and she is painting faces. I feel like that's quite good right?
Because she wants to paint ALL the time, we've come up with some ways to make it easier - and less messy - for us. If you've got toddlers I hope this helps :)
1. Watercolours
Watercolours are hands down my most favourite paints for children. They're easy to use, give gorgeous results, aren't too messy, and they last. We learnt two kids ago that those cheap 'kids' paints - you know the kind that come in big tubs of bright colours, all gloopy and sticky - they're not so great. They're cheap but they're just so messy and they very quickly become a brown sludge on the paper when a toddler uses them together.Â
But watercolours are a whole different story. I know they're more expensive, but I really think it's worth it. Kids love using decent art materials, and it gives them confidence when the results are better. The kind of confidence and willingness to experiment is a great thing :)
We have a few little palettes of watercolours like these ones, and these ones, and they're fab.
2. Big paper
We tend to give Martha A3 sheets of what we call sugar paper here in the UK. It's just a thick slightly textured paper that holds it's form really well. Alternatively we use the rolls of paper from Ikea that fit onto her easel. Which leads to...
3. An easel
Matilda and Theo never had an easel, but already I can see how much of an impact it's had on Martha. She uses it every day. Multiple times. Nearly as much as her Wobbel board! We've got the basic kids easel from Ikea and it's great. It means she has her own art space, and that seems to mean a lot - even at her teeny age. Plus we don't have to keep getting materials out and putting them away all the time.
If you don't have space for an easel a highchair tray works well too :)
4. A long sleeved bib or overalls!
Now I know I said watercolours weren't as messy, but we're still mixing them with a toddler and that means at least some level of mess! Another Ikea purchase (can you tell we're fans?!) this one is great.Â
5. Put the water in a heavy pot
We learnt this the hard way!! After a few *a lot* of spillages after using plastic cups for the paint water, we realised - heavy is better!
Martha loves to use her paintbrush in different ways - stabbing it onto the paper, using the tip in gentle sweeps, swishing it in circles, painting her fingers, using the wooden end to scratch into the paint, whatever works.
It's fun and she's learning so much.
I know getting creative with toddlers can feel overwhelming - it's the mess I'm sure of it. But it's so much fun really, and they love it.
And trust me on the watercolours - total game changer :)
âď¸ For more brilliant craft ideas for toddlers and children head to our Reuse & Recycle page.
âď¸ Or have a browse of our Pinterest boards for even more craft and play ideas.
Â
Â
Â
]]>Last week over on Facebook and Instagram we talked about me starting a âbook of the weekâ post on the blog. And todayâs the day. I'm so excited to start sharing our favourites with youÂ
The very first picture book Iâd love share with you is Lola Dutch by Kenneth and Sarah Jane Wright.
Sarah Jane is one of my very favourite illustrators and Iâve followed her for years. Weâve had her prints hanging on our walls since Theo was a baby.
Her work is beautiful.
Lola Dutch came out last month and itâs gorgeous in every way. Lola is a creative little fireball with the biggest imagination. She is always bursting with ideas
Lola spends her days with her animal friends, and tries to pull them each into her wild creative plans. It's adorable to see how her little brain works, and how it's translated onto the page.
Sarah and Kenneth have made it work perfectly.Â
The watercolour illustrations are delicate and beautiful. I could stare at them all day long.Â
From what I've read Lola Dutch has been ten years in the making - proof that dreams really do come true if you work hard enough for them!
And on the hardback edition there is the most genius surprise inside the dust cover. It's amazing!
Itâs perfect for creative kids and is already a definite favourite in our house
đ For more children's book reviews head to our blog.
đ Visit our story time category for our favourite products to inspire imaginations through reading and writing stories.
đ Or have a browse of our Pinterest boards for even more family storytelling ideas.
Â
]]>This is me. No make up, fresh out of a swimming lesson, bags under my eyes, and a photo snapped while I walked to the studio last week. Itâs been so long since I introduced myself, that perhaps itâs time. To be honest Iâm not sure Iâve ever properly said hello! So...
Iâm Laura. Hello! Iâm the eldest of five siblings (my two sisters both work with me at Clara and Macy HQ). I grew up near Manchester, moved away to university in South Wales, and then moved nearly back home afterwards - except I brought Tom, my husband, with me. Heâs my favourite person in the entire world. And heâs a brilliant childrenâs author  A few years later we travelled around Australia for a while before getting married and having our babies. Weâve got three kids (Matilda - 9, Theo - 7, and Martha - 2) and so donât get much sleep!
I worked in animation for ten years, making puppets for films like Fantastic Mr Fox and The Corpse Bride. It was super fun but the time came when I wanted to make my own designs, so Clara and Macy began. I never intended to run a business, it started out as a portfolio to show childrenâs book publishers, but life took me in a different direction! And I love it
Iâve had PND with every baby, hyperemesis too, and just to throw an extra into the mix - pre-eclampsia with the first two. It was so severe that Theo, our second, was born 10 weeks early! We were very lucky with his 7 week NICU journey. I struggled to breastfeed with each one too so exclusively expressed each time. Everywhere and anywhere, up to 10 times a day, for 13, 15, and 19 months. I was super lucky with my milk supply and so donated gallons of excess to the milk bank for preemies. I felt like it was my super power
I love tea. A lot. I wouldnât ever say no to a gluten and dairy free cake! And Iâm a veggie.
Iâm a Ravenclaw. And proud of it! I love reading, when I can find the time, and Harry Potter is my favourite. I adore Gilmore Girls too, although my current fave is Chesapeake Shores
I love designing products, illustrating, and encouraging kids to get creative and families to spend time together. Itâs an amazing thing.
This is me. Hello! Iâd love to get to know you too  x
P.S. slightly regretting this giant photo of my face already!!!
If youâve seen my posts on Facebook or Instagram recently youâll know that Iâve started sketching again, for the first time in about a year. And it feels so, so good!
Iâm very rusty, of course - who wouldnât be after a year, and Iâm quite nervous about sharing them.
Iâm finding my way, and my style, all over again.
But having a pencil in my hand again and drawing with no agenda, no plan, no expectations, is exactly what I need. Itâs so fun!
Iâm overcoming my strange fear of sketchbooks and making mistakes, and am using a brand new moleskine along with my favourite skinny pencil. Itâs from Muji and itâs my favourite! It takes 0.5mm lead instead of the standard 0.7mm so gives me the perfect delicate line that I love
I just adore sketching these little characters.
And I especially love adding freckles - there is something about frecklesÂ
I donât know what has clicked this year but this is the most confident Iâve ever felt with my drawing ability. That confidence is still around a level 3/10 so letâs not get carried away!
But Iâm definitely getting comfortable with my own style and way of drawing. Itâs fun
I donât know where Iâm going with these sketches. Nowhere and everywhere.
But there is definitely going to be a lot more illustration in my future, Iâm sure of it
]]>We believe, do you?
I'm pretty sure you do so we've had an idea...
Would you like some free stickers to help you share the magic?Â
Here's the deal... we'll send you a lovely bundle of free 'I Believe' stickers and you share them on your social media page using the hashtag #webelievedoyou
We want to spread the Christmas joy as far as possible so please feel free to share this with your friends so that they can get some free stickers too.Â
Complete the form here and your stickers will be on the way asap.
Magic shared :)
]]>A few months ago I got the idea in my head to design some beautifully festive enamel pins. And I couldn't shake this one image - a little navy blue and gold circle with the words "I Believe". It reminded me so much of the film Miracle On 34th Street.
Have you seen it?
Do you remember the court case scene when they're trying to prove Kris Kringle is Santa and everyone is wearing "I Believe" badges. That's what I had in my head. Something people can wear and give a little understanding nod to someone else when they see each other wearing them. Because they believe. And so do we!Â
And so I knew that I had to make that little design idea a reality asap :)
Here at Clara and Macy we believe in Santa. In magic. In family. In traditions. And in spending time together.Â
We also believe in Christmas films! Obviously.Â
We've been wearing our pins every day with such pride - proof of our magical beliefs and complete love of Christmas!
And they've been popping up on Instagram and Facebook too, as we've starting sending them out into the world this week. It's been so exciting to see!Â
You can share them with us on social media using the hashtag #webelievedoyou - we would love to see!Â
And now for the most important question of all... What are your top three Christmas films of all time?!Â
Mine are...
- It's A Wonderful Life
- Miracle On 34th Street
- Holiday Inn or maybe Muppets Christmas Carol or maybe The Shop Around The Corner.Â
I love them all SO much I can never decide! I can't wait to watch them all!Â
]]>Who doesnât love a good list? Here at Clara and Macy HQ, you literally couldnât get into the main room without seeing a list up on the wall for something or other. We are completely obsessed.
Not just at the studio either - all of us use lists in our every day life too. I'm not sure we'd make it through the day without a good old, trusty 'to do' list.Â
Donât even get us started on stationery! Okay, go on then, if you insist... diaries, post-it's, notepads, notebooks â we love it all!
What draws you to a notebook? And what kind of pages do you like? Blank, lined, squared? There are just sooo many options.
Because of our teeny obsession we decided to add notebooks to our range, and we love them so much!
We each have our favourites but with the festive season getting closer (eek!), I think this lovely snowman is in the top spot at the moment. Take a look at our little collection of notebooks. Which one is your favourite?
]]>