Making a Roman Amphitheatre: How to build a roman colosseum school craft project
If you follow us on Instagram or Facebook you'll see that we spent Sunday afternoon making a model of a roman amphitheatre for one of Theo's homework challenges.
And he took over my Instagram stories for the day with a follow along tutorial of how he made it. It was SO fun!
And I'm pretty sure we've got a future Blue Peter presenter in the making ;)

So we wanted to put together a blog post tutorial too, just like our solar system one, in case it's any help when you need to make a roman amphitheatre.
Because who doesn't need a roman amphitheatre in their lives?!
Materials to make your Roman Amphitheatre:
- some thick cardboard sheets
- glue gun & glue
- acrylic paints
- a plate to draw around
- a scalpel (for grown ups only)

Theo did A LOT of research beforehand into exactly what type of model he wanted to make, and what he wanted his amphitheatre to look like. He LOVES this kind of thing!
How to make your Roman Amphitheatre Model:
He started by drawing several circles around our plate on the cardboard. Luckily we have lots of these big sheets of cardboard at the studio leftover from when our wrapping paper gets delivered. But any thickish cardboard would work.
We needed eight circles for our amphitheatre but you could use more or less depending on how tall you want it to be.

I cut each one out using a scalpel. Theo did have a little try with the scalpel, while I held his hand, but he's a leftie and found it really difficult. So I did the tricky cutting.
Once each circle was cut we made them into donut shapes with larger centre holes as we went. The bottom circle has the smallest hole and we each one about 1cm - 1.5cm bigger than the one underneath.
So you want the outside of the circle to be the same size, but the inside to get smaller - hope that makes sense!
These make the seats.

Whilst I was cutting the circles Theo painted the base using acrylic paints. He wanted a sandy base so used yellow, orange, and cream paints, with some green splashes for grassy areas!
- a top tip we found for painting sandy texture is to dab your brush onto the base rather than paint with strokes. So your dab dab dabbing to create a mottled texture.

Once all of the circles were cut we got our trusty glue gun out and glued them together.
Theo and Matilda are both really confident using a glue gun (all that wand making has paid off!). He started with the smallest ring at the bottom and then glued each one on top.
Then he glued this whole structure to the base.

To make the outer wall of the amphitheatre we cut a long strip of the same cardboard and Theo drew the shape of the wall he wanted - with one taller side.
A really good tip for helping the wall to bend around your circular seats is to scalpel some vertical lines at regular intervals.
Cut through about half of the depth of the cardboard, so it doesn't slice fully through. Keep the cut sides as the outside, and then you'll find it bends round really well.

Theo drew some arches into the taller side of the wall and I cut them out.
We thought this gave it an authentic tumbledown feel!

Once they were cut we glued the wall around the outside of our circular seats.
This was a little tricky and we took our time. We found gluing it in small sections worked best.

We thought that the combination of the arches and the vertical slices gave a really good look to the outside wall. The slices worked really well!

Theo drew some lower arch shapes around the wall to give a bit more detail and a more authentic look :)

Once the amphitheatre was all put together we added a few details.
A lion, of course! We just printed this and glued it onto some thin card before gluing it to the base.
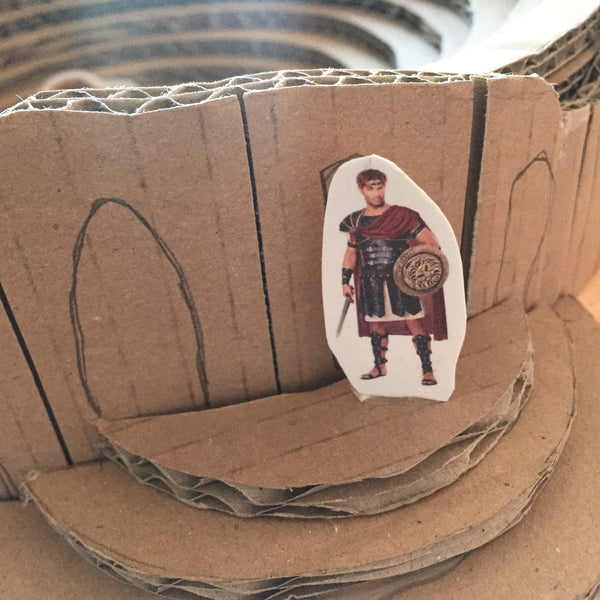
And Theo insisted on putting the gladiator on the steps outside of the amphitheatre - because why would he want to be inside with the lion?!
Well exactly Theo!

So there you have it. A pretty effective but really very simple to make roman amphitheatre.
Theo absolutely loved making it and he learnt so much.
Filming the process for his Instagram stories takeover worked brilliantly too, as he really thought extra hard about every step of the process so that he could explain it on camera.

One of his 'grown up' career options is to be a set designer for films. I think he's off to a great start don't you?!
If you have any questions do send them through - Theo is loving your messages and comments :) x
✂️ For more brilliant school project and craft ideas for children head to our Reuse & Recycle page.
✂️ Or have a browse of our Pinterest boards for even more school project, craft, and play ideas.